
1주차 교육내용 (1-1)
- 웹 → 개발을 입문할 때 배우는 개발의 기초 think (= HTML과 CSS를 배우는 과정)
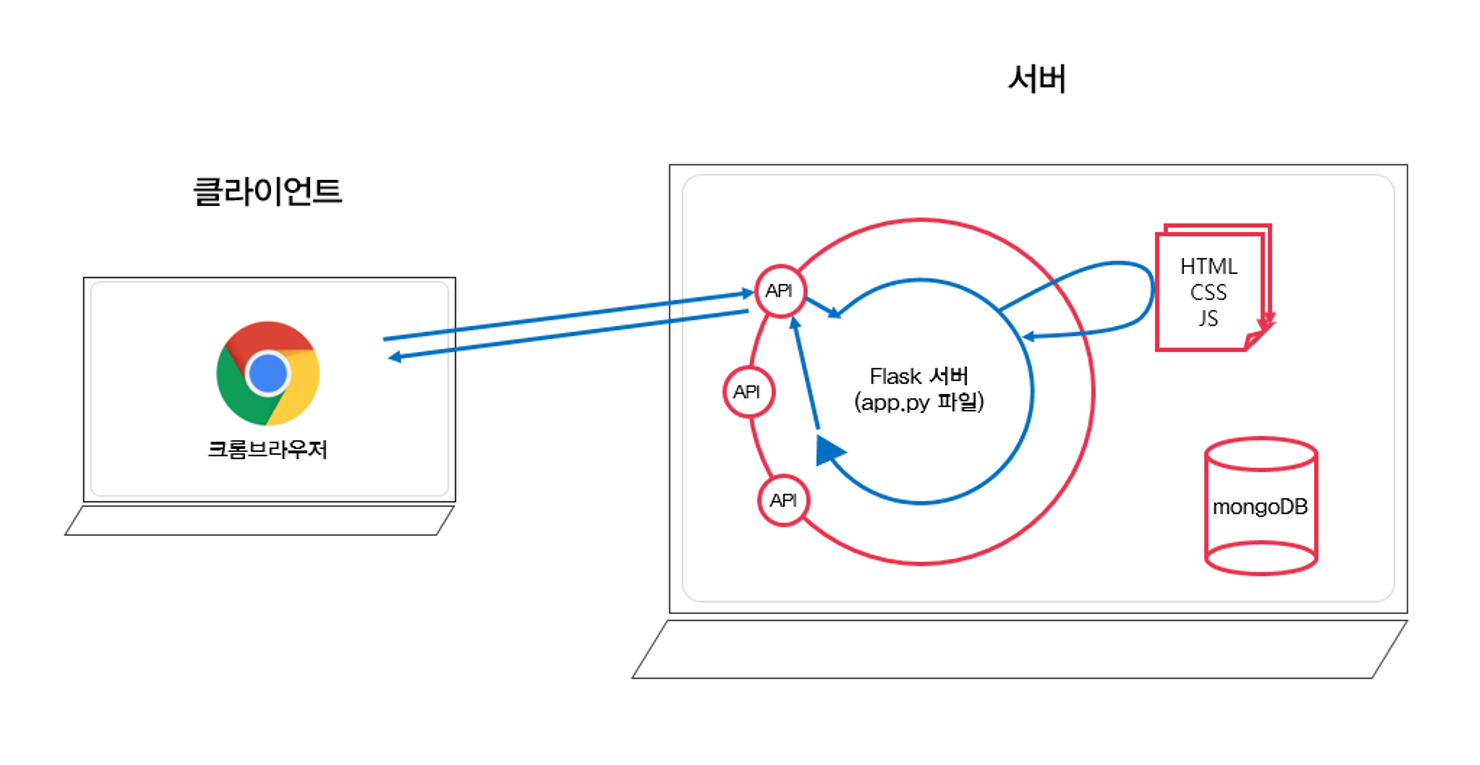
웹 브라우저 작동 원리(1-2)
- 페이지 어떻게 보여지는지 알아보는 시간
- F12 or ‘검사’ 기능 활용하여 페이지 해킹 가능 (in crome / 단, 일시적)
- 웹의 동작 개념 요청하는 쪽 : 브라우저(클라이언트), 주는 쪽 : 서버
- 각 코드 = 이렇게 그려달라는 설명서로 생각하기
ex) HTML : 뼈대, CSS : 꾸미기, JavaScript : 움직일 수 있도록 도와줌
코딩환경 세팅하기 (1-3)
- 개발 환경 세팅하기 : Vs Code 설치 (= 쉽게 코딩가능한 프로그램)
- 설치 후, Extension(확장 프로그램) 부가적으로 설치
ex) Open In Browser, 한국어 팩 등
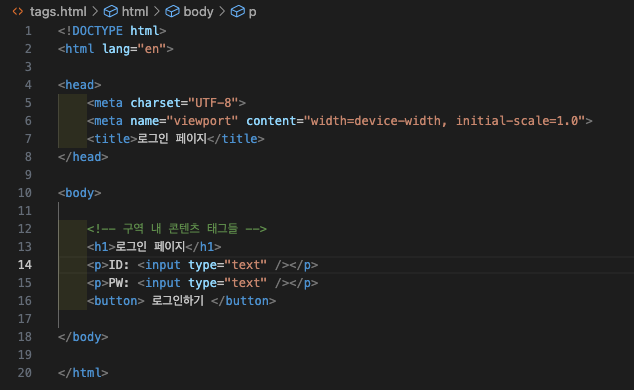
HTML 기초 (1-4)
- 폴더 및 파일 생성 (바탕화면 - sparta - frontend 순)
- html:5 (or !) 사용, (기본적인 뼈대 생성)
- HTML tag 기초 요소 배우기 (다 외울 필요 X)
head 안에 들어가는 대표적인 요소들: meta, script, style, link, title 등
body 안에 들어가는 대표적인 요소들: span, img, input, textarea 등 - 코드 정렬 단축키 → [Shift + Optiion + F] (자주 쓰일 예정)
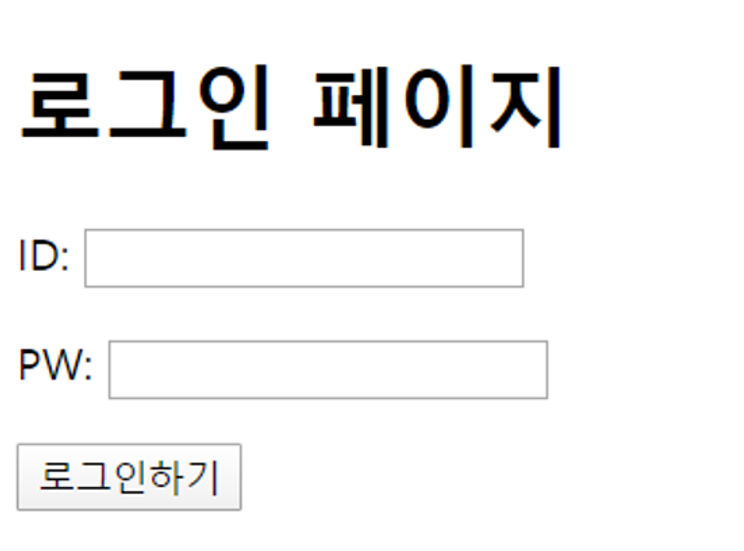
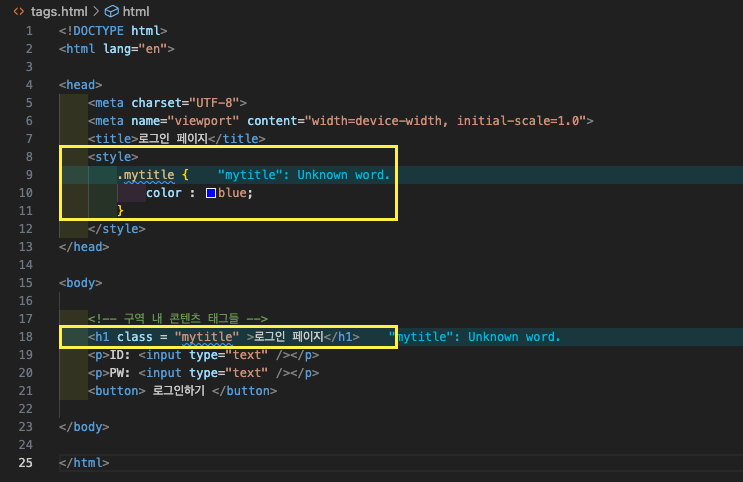
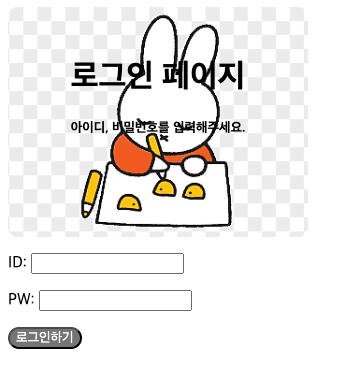
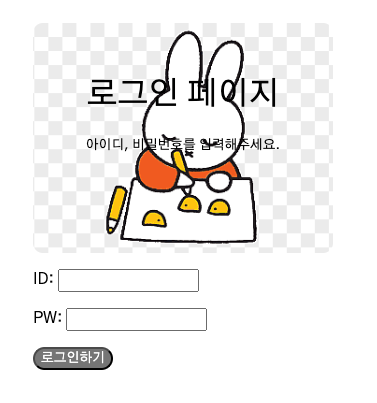
로그인 페이지 만들기(1-5)
- 결과물 및 완성코드
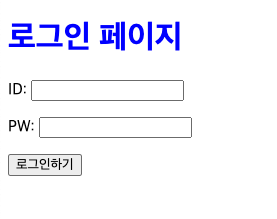
CSS 기초 (1-6)
- 꾸미기 → 뭔가를 가리켜야 가능, 지칭할 수 있는 명령의 대상이 필요
- CSS → 명찰로 생각하면 쉬움
- CSS 실습 - 로그인 페이지 코드 활용
자주 쓰는 CSS 1 (1-7)
- 자주 쓰이는 CSS 모음집
가로 : width, 세로 : height, 바탕컬러 : background-color(자동완성 사용), 색상: color
정렬 : text-align, 안쪽 여백 : padding, 바깥여백 : margin, 둥글게 만들기 : border-radius - 이미지 삽입 CSS
background-image : url(’이미지 주소’); → ‘ ’ 잘 적용되었는지 확인할 것
background-position : center;
background-size : cover; - 이미지 주소 변경 → https://ifh.cc/ 활용하기
- 결과물 및 완성코드
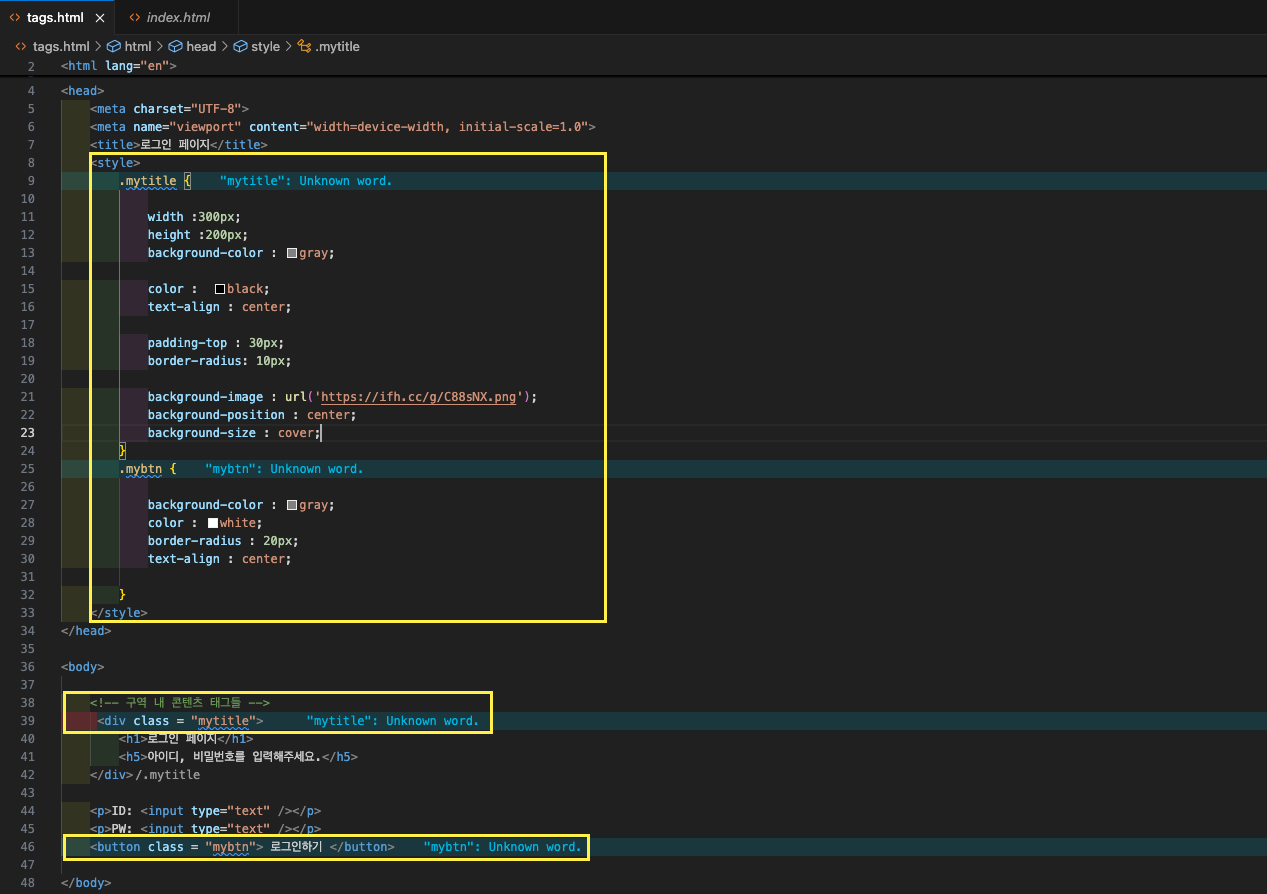
자주 쓰는 CSS2 (1-8)
- 로그인 페이지, 가운데로 이동 → 구역 감싸기 : <div> 활용
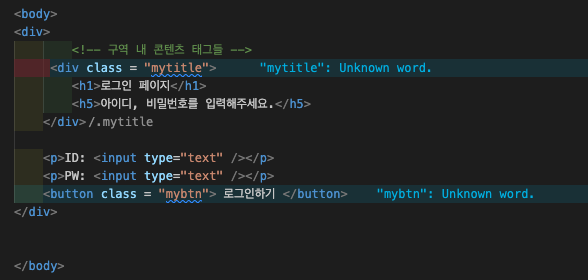
- 끝까지 간다 → auto 사용
- 최종 결과물 및 완성 코드


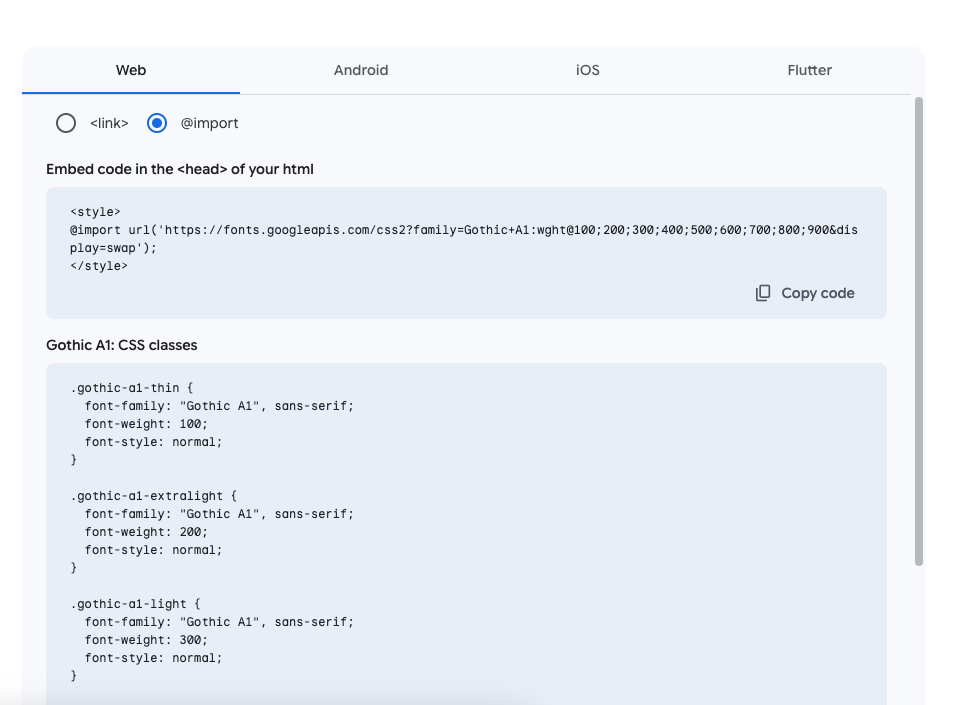
[구글폰트] 잘 가져다 쓰기 (1-9)
- Google fonts 활용 (in 크롬)
- 원하는 폰트 적용 → Get Font 클릭, 코드 복붙해서 <head>에 삽입
+) *= 모든 태그에 적용 , font-family로 시작하는 코드 넣어주기
- 결과물 및 완성코드

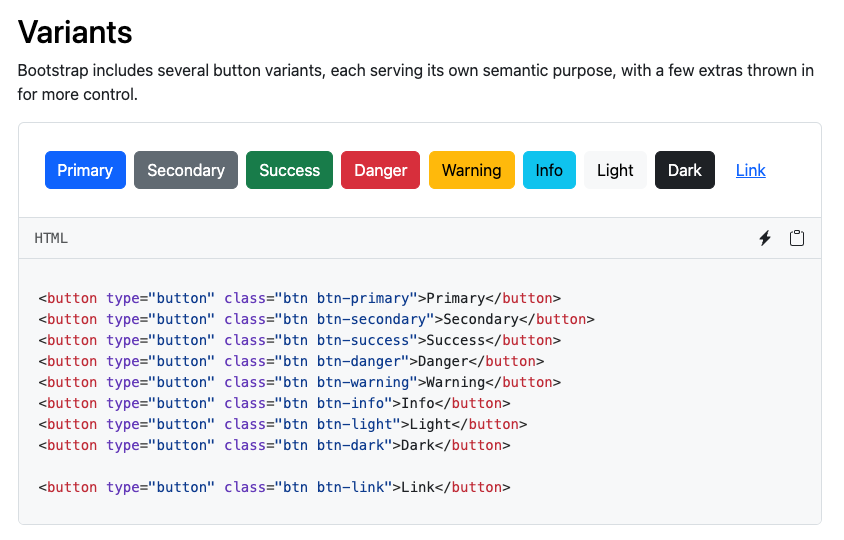
[부트스트랩] 잘 가져다 쓰기 (1-10)
- 부트스트랩 = 남이 만들어 놓은 “이쁜” CSS 꾸러미
- 맘에드는 거 골라서 <body>에 삽입하기
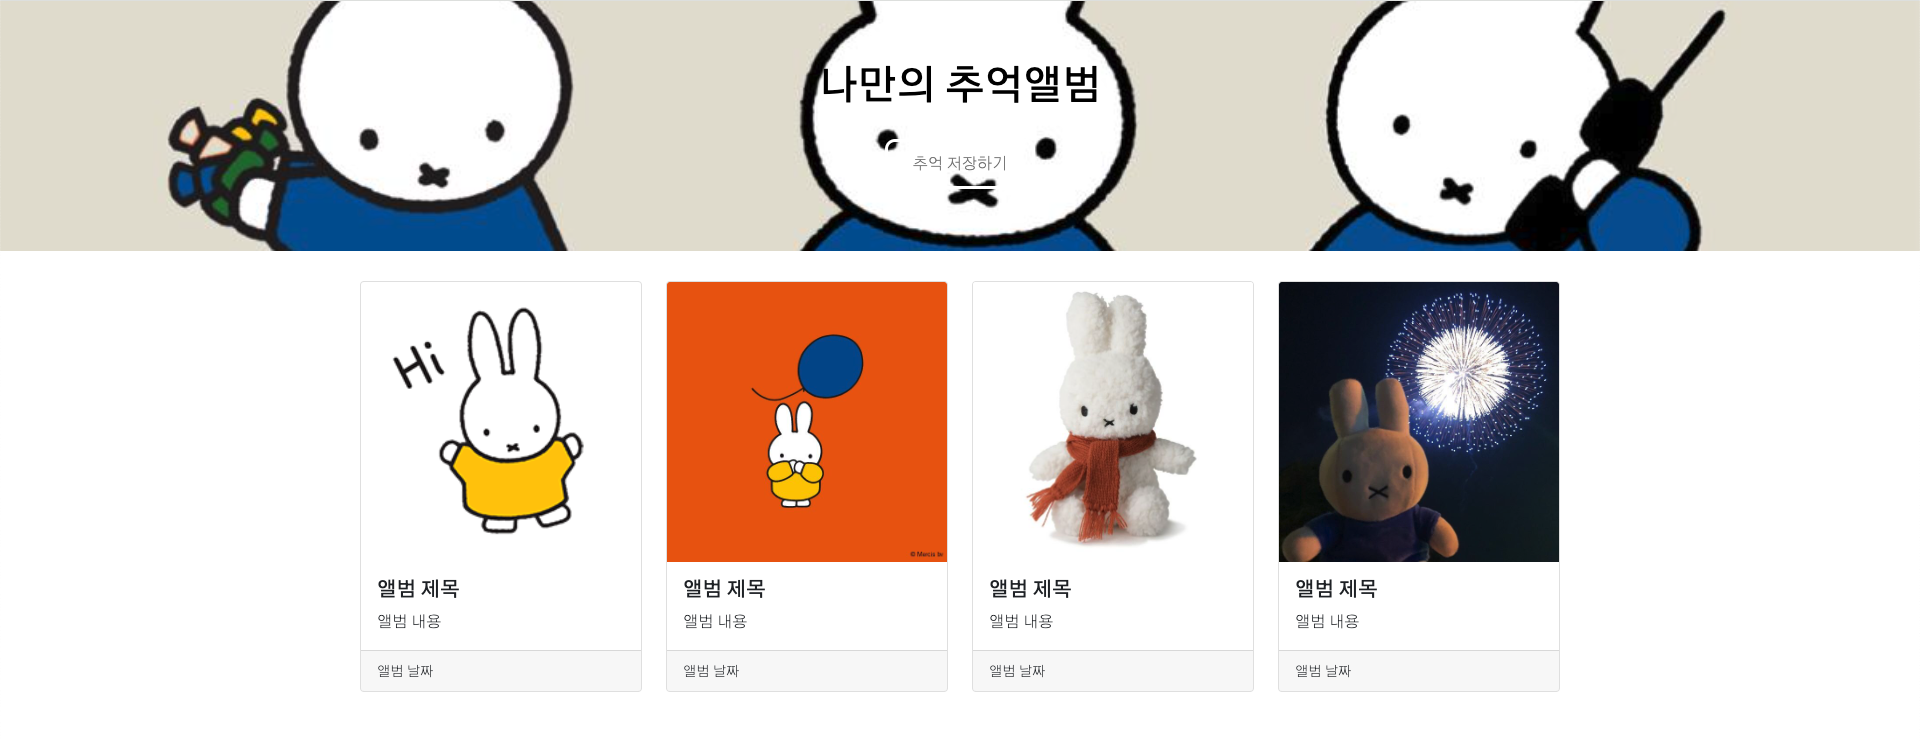
[추억앨범] 프로젝트 (1-11)
- 완성코드
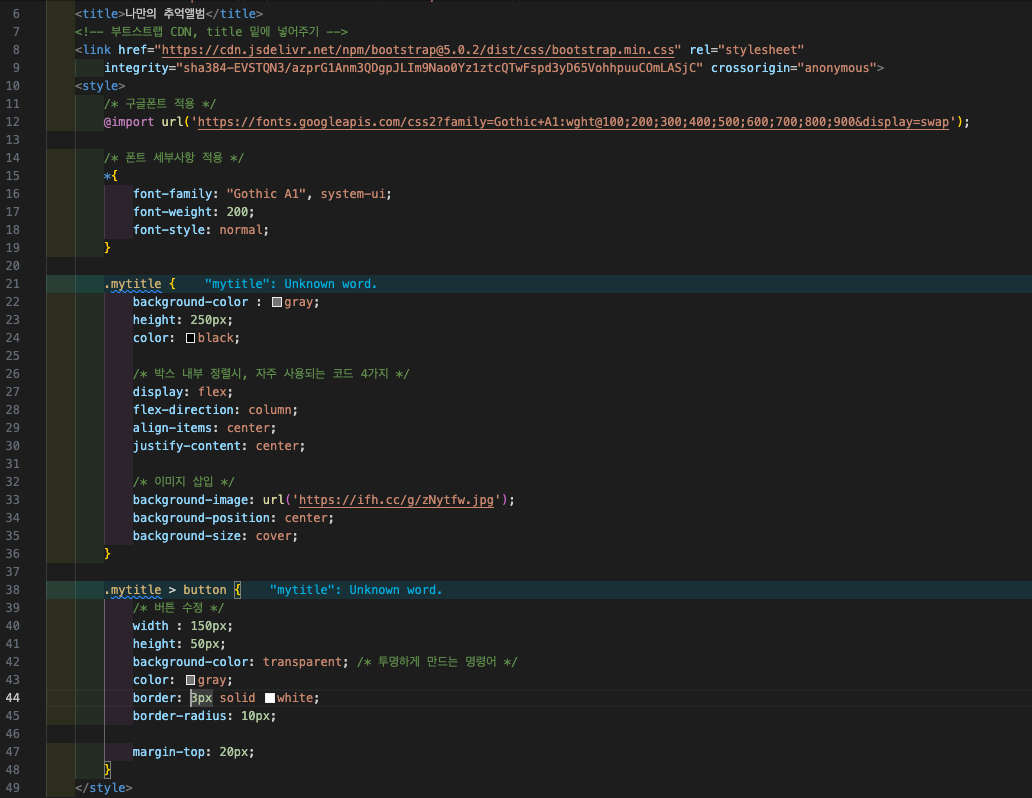
- 결과물
[추억앨범] 프로젝트 (1-12)
- 포스팅 박스 제작
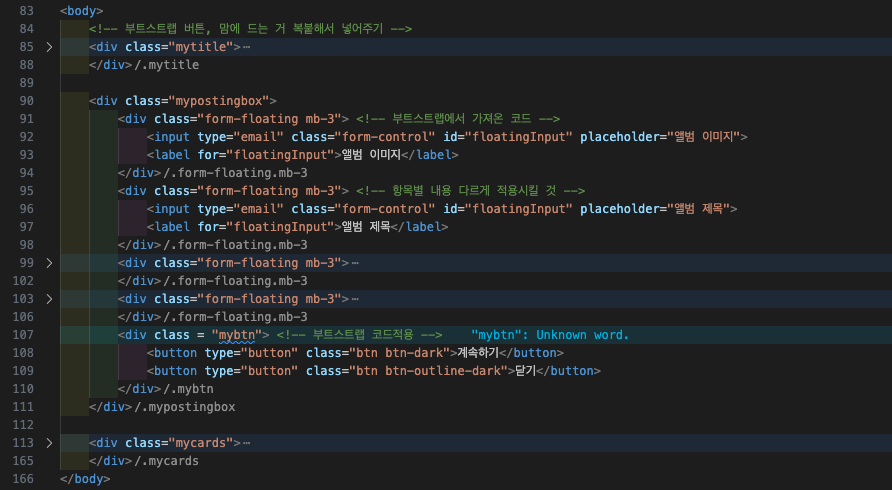
- 결과물
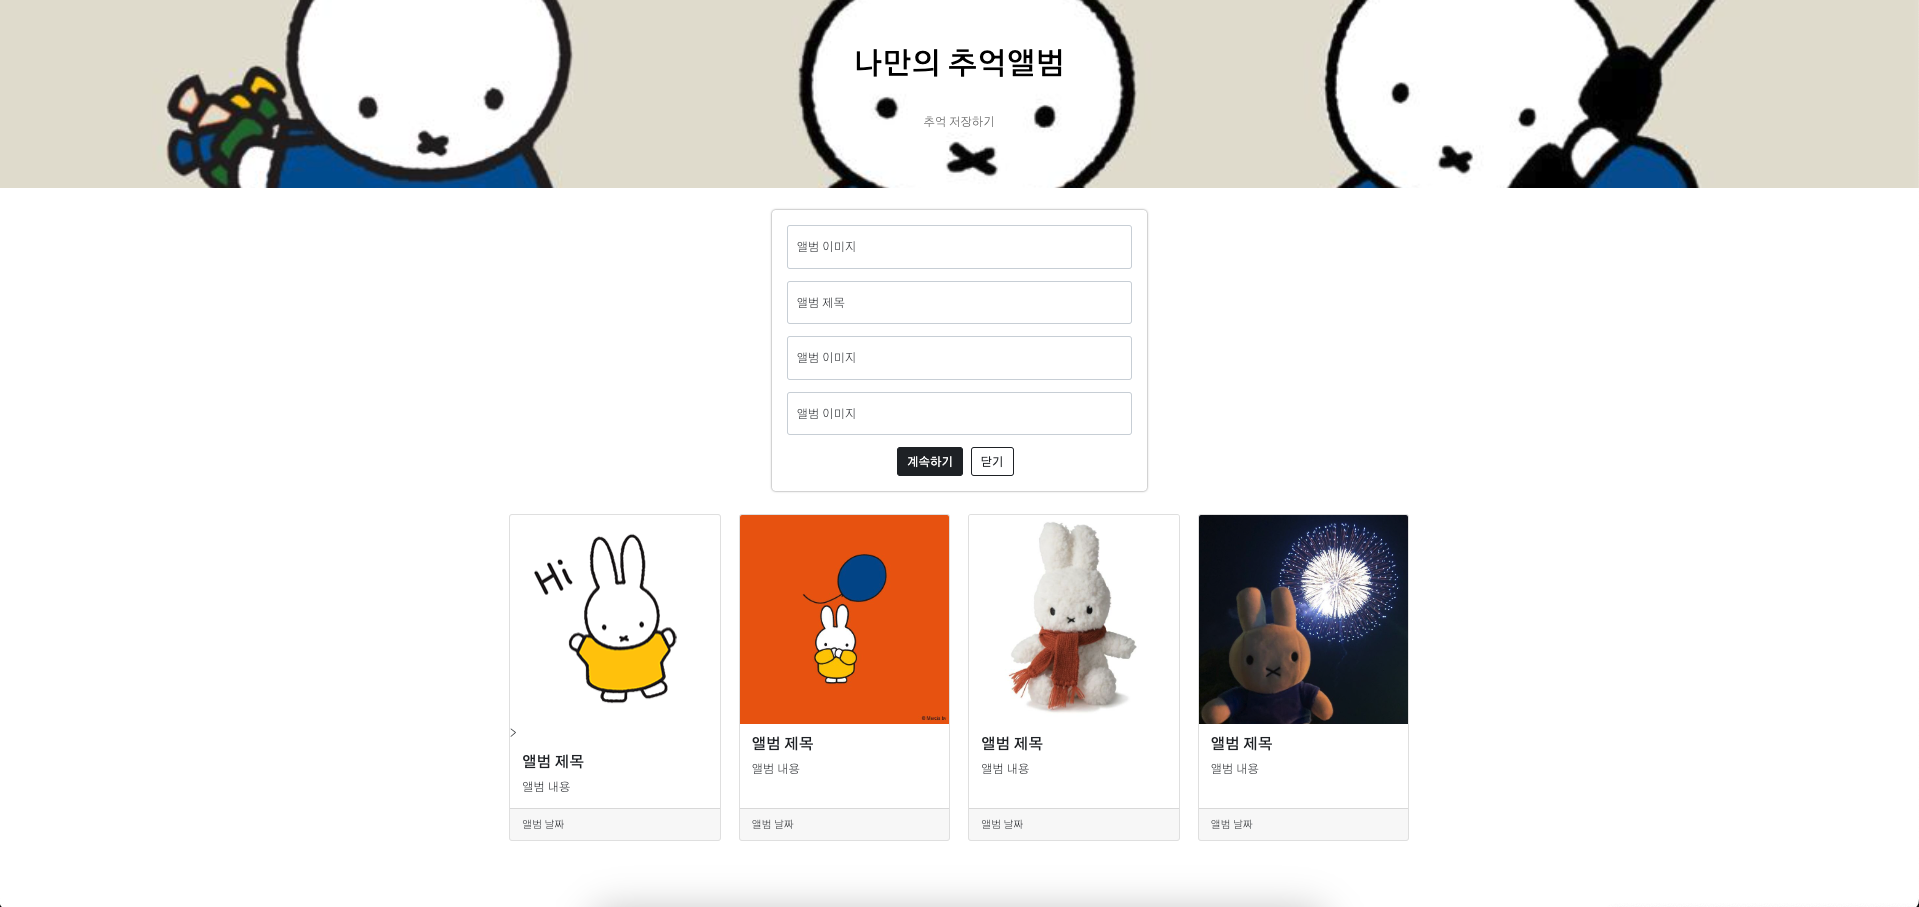
결과물 완성코드(최종)
<!DOCTYPE html>
<html lang="en">
<head>
<meta charset="UTF-8">
<meta name="viewport" content="width=device-width, initial-scale=1.0">
<title>나만의 추억앨범</title>
<!-- 부트스트랩 CDN, title 밑에 넣어주기 -->
<link href="https://cdn.jsdelivr.net/npm/bootstrap@5.0.2/dist/css/bootstrap.min.css" rel="stylesheet"
integrity="sha384-EVSTQN3/azprG1Anm3QDgpJLIm9Nao0Yz1ztcQTwFspd3yD65VohhpuuCOmLASjC" crossorigin="anonymous">
<style>
/* 구글폰트 적용 */
@import url('https://fonts.googleapis.com/css2?family=Gothic+A1:wght@100;200;300;400;500;600;700;800;900&display=swap');
/* 폰트 세부사항 적용 */
* {
font-family: "Gothic A1", system-ui;
font-weight: 200;
font-style: normal;
}
.mytitle {
background-color: gray;
height: 250px;
color: black;
/* 박스 내부 정렬시, 자주 사용되는 코드 4가지 */
display: flex;
flex-direction: column;
align-items: center;
justify-content: center;
/* 이미지 삽입 */
background-image: url('https://ifh.cc/g/zNytfw.jpg');
background-position: center;
background-size: cover;
}
.mytitle>button {
/* 버튼 수정 */
width: 150px;
height: 50px;
background-color: transparent;
/* 투명하게 만드는 명령어 */
color: gray;
border: 3px solid white;
border-radius: 10px;
margin-top: 20px;
}
.mycards {
/* 게시물 정렬 */
width: 1200px;
margin: 30px auto 0px auto;
}
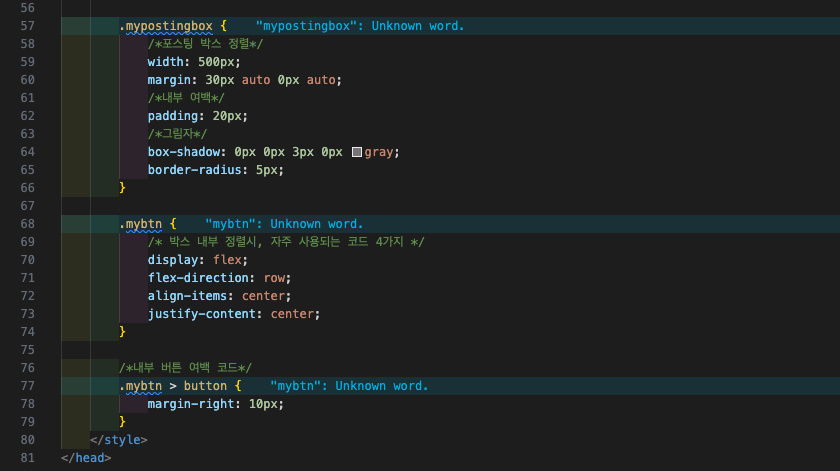
.mypostingbox {
/*포스팅 박스 정렬*/
width: 500px;
margin: 30px auto 0px auto;
/*내부 여백*/
padding: 20px;
/*그림자*/
box-shadow: 0px 0px 3px 0px gray;
border-radius: 5px;
}
.mybtn {
/* 박스 내부 정렬시, 자주 사용되는 코드 4가지 */
display: flex;
flex-direction: row;
align-items: center;
justify-content: center;
}
/*내부 버튼 여백 코드*/
.mybtn > button {
margin-right: 10px;
}
</style>
</head>
<body>
<!-- 부트스트랩 버튼, 맘에 드는 거 복붙해서 넣어주기 -->
<div class="mytitle">
<h1> 나만의 추억앨범 </h1>
<button> 추억 저장하기 </button>
</div>
<div class="mypostingbox">
<div class="form-floating mb-3"> <!-- 부트스트랩에서 가져온 코드 -->
<input type="email" class="form-control" id="floatingInput" placeholder="앨범 이미지">
<label for="floatingInput">앨범 이미지</label>
</div>
<div class="form-floating mb-3"> <!-- 항목별 내용 다르게 적용시킬 것 -->
<input type="email" class="form-control" id="floatingInput" placeholder="앨범 제목">
<label for="floatingInput">앨범 제목</label>
</div>
<div class="form-floating mb-3">
<input type="email" class="form-control" id="floatingInput" placeholder="앨범 내용">
<label for="floatingInput">앨범 이미지</label>
</div>
<div class="form-floating mb-3">
<input type="email" class="form-control" id="floatingInput" placeholder="앨범 날짜">
<label for="floatingInput">앨범 이미지</label>
</div>
<div class = "mybtn"> <!-- 부트스트랩 코드적용 -->
<button type="button" class="btn btn-dark">계속하기</button>
<button type="button" class="btn btn-outline-dark">닫기</button>
</div>
</div>
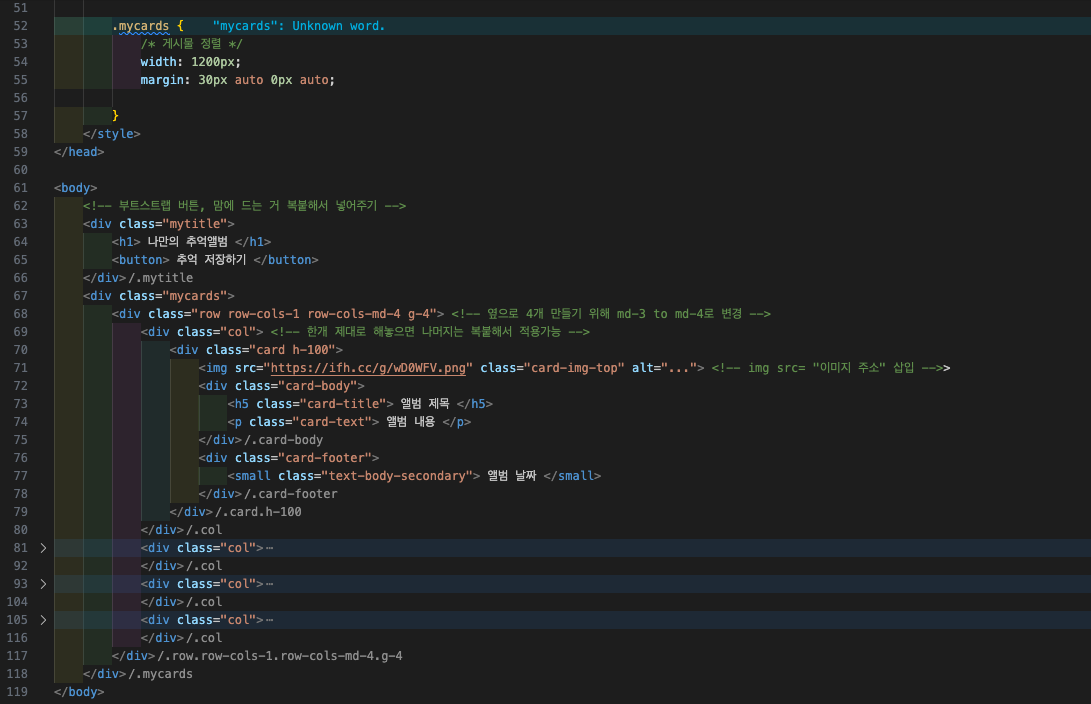
<div class="mycards">
<div class="row row-cols-1 row-cols-md-4 g-4"> <!-- 옆으로 4개 만들기 위해 md-3 to md-4로 변경 -->
<div class="col"> <!-- 한개 제대로 해놓으면 나머지는 복붙해서 적용가능 -->
<div class="card h-100">
<img src="https://ifh.cc/g/wD0WFV.png" class="card-img-top" alt="...">
<!-- img src= "이미지 주소" 삽입 -->
<div class="card-body">
<h5 class="card-title"> 앨범 제목 </h5>
<p class="card-text"> 앨범 내용 </p>
</div>
<div class="card-footer">
<small class="text-body-secondary"> 앨범 날짜 </small>
</div>
</div>
</div>
<div class="col">
<div class="card h-100">
<img src="https://ifh.cc/g/429HYa.jpg" class="card-img-top" alt="...">
<div class="card-body">
<h5 class="card-title"> 앨범 제목 </h5>
<p class="card-text"> 앨범 내용 </p>
</div>
<div class="card-footer">
<small class="text-body-secondary"> 앨범 날짜 </small>
</div>
</div>
</div>
<div class="col">
<div class="card h-100">
<img src="https://ifh.cc/g/fctWdS.jpg" class="card-img-top" alt="...">
<div class="card-body">
<h5 class="card-title"> 앨범 제목 </h5>
<p class="card-text"> 앨범 내용 </p>
</div>
<div class="card-footer">
<small class="text-body-secondary"> 앨범 날짜 </small>
</div>
</div>
</div>
<div class="col">
<div class="card h-100">
<img src="https://ifh.cc/g/dvQ7H2.jpg" class="card-img-top" alt="...">
<div class="card-body">
<h5 class="card-title"> 앨범 제목 </h5>
<p class="card-text"> 앨범 내용 </p>
</div>
<div class="card-footer">
<small class="text-body-secondary"> 앨범 날짜 </small>
</div>
</div>
</div>
</div>
</div>
</body>
</html>728x90
반응형
'React TIL' 카테고리의 다른 글
| [React] Day_6 데일리 정리 (이어서) (0) | 2024.09.05 |
|---|---|
| [React] Day_5 데일리 정리 (3) | 2024.09.03 |
| [React] Day_4 맨땅에 헤딩하는 실습일기 - (2) (2) | 2024.09.02 |
| [React] Day_3 맨땅에 헤딩하는 실습일기 - (1) (2) | 2024.08.31 |
| [React] Day_1 데일리 정리 (6) | 2024.08.28 |


